No edit summary |
(Removed old video, added new leader spotlight videos to better reflect NR in it's current state.) Tag: Visual edit |
||
| (13 intermediate revisions by 2 users not shown) | |||
| Line 3: | Line 3: | ||
'''Northern Realms''' |
'''Northern Realms''' |
||
| − | The Northern Realms seek to gain control of the battlefield by reinforcing their numbers. Their valiant commanders march in the front lines to inspire their units and boost their strength. Their troops can be |
+ | The Northern Realms seek to gain control of the battlefield by reinforcing their numbers. Their valiant commanders march in the front lines to inspire their units and boost their strength. Their troops can be protected against attacks and weather spells thanks to Armor and Shields. |
'''[[Cards History - Northern Realms]]''' |
'''[[Cards History - Northern Realms]]''' |
||
| Line 15: | Line 15: | ||
*{{Tooltip|King Foltest}} |
*{{Tooltip|King Foltest}} |
||
*{{Tooltip|King Henselt}} |
*{{Tooltip|King Henselt}} |
||
| ⚫ | |||
*{{Tooltip|King Radovid V}} |
*{{Tooltip|King Radovid V}} |
||
| ⚫ | |||
*{{Tooltip|Princess Adda}} |
*{{Tooltip|Princess Adda}} |
||
| ⚫ | |||
*{{Tooltip|Queen Meve}} |
*{{Tooltip|Queen Meve}} |
||
{{Col-end}} |
{{Col-end}} |
||
| Line 26: | Line 27: | ||
{{Col-2}} |
{{Col-2}} |
||
*{{Tooltip|Anna Strenger}} |
*{{Tooltip|Anna Strenger}} |
||
| ⚫ | |||
*{{Tooltip|Bloody Baron}} |
*{{Tooltip|Bloody Baron}} |
||
*{{Tooltip|Coodcoodak}} |
*{{Tooltip|Coodcoodak}} |
||
*{{Tooltip|Dandelion}} |
*{{Tooltip|Dandelion}} |
||
| − | *{{Tooltip| |
+ | *{{Tooltip|Donimir of Troy}} |
| ⚫ | |||
*{{Tooltip|Keira Metz}} |
*{{Tooltip|Keira Metz}} |
||
*{{Tooltip|King Roegner}} |
*{{Tooltip|King Roegner}} |
||
| Line 35: | Line 38: | ||
*{{Tooltip|Knighthood}} |
*{{Tooltip|Knighthood}} |
||
*{{Tooltip|Philippa Eilhart}} |
*{{Tooltip|Philippa Eilhart}} |
||
| ⚫ | |||
*{{Tooltip|Priscilla}} |
*{{Tooltip|Priscilla}} |
||
| ⚫ | |||
| ⚫ | |||
| + | *{{Tooltip|Prophet Lebioda}} |
||
| + | *{{Tooltip|Queen Adalia}} |
||
*{{Tooltip|Reynard Odo}} |
*{{Tooltip|Reynard Odo}} |
||
*{{Tooltip|Roche: Merciless}} |
*{{Tooltip|Roche: Merciless}} |
||
| Line 42: | Line 48: | ||
*{{Tooltip|Shani}} |
*{{Tooltip|Shani}} |
||
*{{Tooltip|Sigismund Dijkstra}} |
*{{Tooltip|Sigismund Dijkstra}} |
||
| + | *{{Tooltip|Trollololo}} |
||
*{{Tooltip|Vandergrift}} |
*{{Tooltip|Vandergrift}} |
||
*{{Tooltip|Vernon Roche}} |
*{{Tooltip|Vernon Roche}} |
||
| + | *{{Tooltip|Vissegerd}} |
||
| + | *{{Tooltip|Voymir}} |
||
*{{Tooltip|Vysogota of Corvo}} |
*{{Tooltip|Vysogota of Corvo}} |
||
*{{Tooltip|Windhalm of Attre}} |
*{{Tooltip|Windhalm of Attre}} |
||
{{Col-end}} |
{{Col-end}} |
||
| − | |||
| − | === Silver === |
||
{{Col-begin}} |
{{Col-begin}} |
||
{{Col-2}} |
{{Col-2}} |
||
| Line 62: | Line 69: | ||
*{{Tooltip|Prince Stennis}} |
*{{Tooltip|Prince Stennis}} |
||
*{{Tooltip|Princess Pavetta}} |
*{{Tooltip|Princess Pavetta}} |
||
| ⚫ | |||
*{{Tooltip|Reinforcements}} |
*{{Tooltip|Reinforcements}} |
||
| ⚫ | |||
*{{Tooltip|Ronvid the Incessant}} |
*{{Tooltip|Ronvid the Incessant}} |
||
*{{Tooltip|Sabrina Glevissig}} |
*{{Tooltip|Sabrina Glevissig}} |
||
| Line 69: | Line 76: | ||
*{{Tooltip|Síle de Tansarville}} |
*{{Tooltip|Síle de Tansarville}} |
||
*{{Tooltip|Thaler}} |
*{{Tooltip|Thaler}} |
||
| ⚫ | |||
*{{Tooltip|Vandergrift's Blade}} |
*{{Tooltip|Vandergrift's Blade}} |
||
*{{Tooltip|Ves}} |
*{{Tooltip|Ves}} |
||
| Line 89: | Line 95: | ||
*{{Tooltip|Blue Stripe Scout}} |
*{{Tooltip|Blue Stripe Scout}} |
||
*{{Tooltip|Cintrian Artificer}} |
*{{Tooltip|Cintrian Artificer}} |
||
| + | *{{Tooltip|Cintrian Enchantress}} |
||
*{{Tooltip|Cintrian Envoy}} |
*{{Tooltip|Cintrian Envoy}} |
||
*{{Tooltip|Cintrian Knight}} |
*{{Tooltip|Cintrian Knight}} |
||
| + | *{{Tooltip|Cintrian Royal Guard}} |
||
*{{Tooltip|Cintrian Spellweaver}} |
*{{Tooltip|Cintrian Spellweaver}} |
||
*{{Tooltip|Cursed Knight}} |
*{{Tooltip|Cursed Knight}} |
||
| Line 102: | Line 110: | ||
*{{Tooltip|Lyrian Arbalest}} |
*{{Tooltip|Lyrian Arbalest}} |
||
*{{Tooltip|Lyrian Cavalry}} |
*{{Tooltip|Lyrian Cavalry}} |
||
| ⚫ | |||
*{{Tooltip|Lyrian Landsknecht}} |
*{{Tooltip|Lyrian Landsknecht}} |
||
| ⚫ | |||
*{{Tooltip|Lyrian Scytheman}} |
*{{Tooltip|Lyrian Scytheman}} |
||
| + | *{{Tooltip|Mad Charge}} |
||
*{{Tooltip|Poor Fucking Infantry}} |
*{{Tooltip|Poor Fucking Infantry}} |
||
| + | *{{Tooltip|Radovid's Royal Guards}} |
||
*{{Tooltip|Reaver Hunter}} |
*{{Tooltip|Reaver Hunter}} |
||
*{{Tooltip|Reaver Scout}} |
*{{Tooltip|Reaver Scout}} |
||
| + | *{{Tooltip|Redanian Archer}} |
||
*{{Tooltip|Redanian Elite}} |
*{{Tooltip|Redanian Elite}} |
||
*{{Tooltip|Redanian Knight}} |
*{{Tooltip|Redanian Knight}} |
||
| Line 120: | Line 131: | ||
*{{Tooltip|Temerian Drummer}} |
*{{Tooltip|Temerian Drummer}} |
||
*{{Tooltip|Temerian Infantry}} |
*{{Tooltip|Temerian Infantry}} |
||
| + | *{{Tooltip|Temple Guard}} |
||
*{{Tooltip|Tormented Mage}} |
*{{Tooltip|Tormented Mage}} |
||
*{{Tooltip|Tridam Infantry}} |
*{{Tooltip|Tridam Infantry}} |
||
| Line 129: | Line 141: | ||
=== Tokens === |
=== Tokens === |
||
| ⚫ | |||
| − | {{Col-2}} |
||
| ⚫ | |||
| ⚫ | |||
| − | {{Col-2}} |
||
| − | *[[Specter]] |
||
| − | {{Col-end}} |
||
| − | |||
| + | == Cards Listed by Alphabetical Order == |
||
| − | == By position == |
||
=== Unit === |
=== Unit === |
||
| Line 156: | Line 160: | ||
*{{Tooltip|Botchling}} |
*{{Tooltip|Botchling}} |
||
*{{Tooltip|Cintrian Artificer}} |
*{{Tooltip|Cintrian Artificer}} |
||
| + | *{{Tooltip|Cintrian Enchantress}} |
||
*{{Tooltip|Cintrian Envoy}} |
*{{Tooltip|Cintrian Envoy}} |
||
*{{Tooltip|Cintrian Knight}} |
*{{Tooltip|Cintrian Knight}} |
||
| + | *{{Tooltip|Cintrian Royal Guard}} |
||
*{{Tooltip|Cintrian Spellweaver}} |
*{{Tooltip|Cintrian Spellweaver}} |
||
*{{Tooltip|Coodcoodak}} |
*{{Tooltip|Coodcoodak}} |
||
| Line 164: | Line 170: | ||
*{{Tooltip|Dandelion}} |
*{{Tooltip|Dandelion}} |
||
*{{Tooltip|Dethmold}} |
*{{Tooltip|Dethmold}} |
||
| + | *{{Tooltip|Donimir of Troy}} |
||
*{{Tooltip|Dun Banner}} |
*{{Tooltip|Dun Banner}} |
||
*{{Tooltip|Falibor}} |
*{{Tooltip|Falibor}} |
||
| Line 187: | Line 194: | ||
*{{Tooltip|Lyrian Scytheman}} |
*{{Tooltip|Lyrian Scytheman}} |
||
*{{Tooltip|Margarita of Aretuza}} |
*{{Tooltip|Margarita of Aretuza}} |
||
| − | {{Col-2}} |
||
*{{Tooltip|Nenneke}} |
*{{Tooltip|Nenneke}} |
||
*{{Tooltip|Odrin}} |
*{{Tooltip|Odrin}} |
||
*{{Tooltip|Philippa Eilhart}} |
*{{Tooltip|Philippa Eilhart}} |
||
| ⚫ | |||
*{{Tooltip|Poor Fucking Infantry}} |
*{{Tooltip|Poor Fucking Infantry}} |
||
| + | *{{Tooltip|Prince Anséis}} |
||
*{{Tooltip|Prince Stennis}} |
*{{Tooltip|Prince Stennis}} |
||
*{{Tooltip|Princess Adda}} |
*{{Tooltip|Princess Adda}} |
||
*{{Tooltip|Princess Pavetta}} |
*{{Tooltip|Princess Pavetta}} |
||
*{{Tooltip|Priscilla}} |
*{{Tooltip|Priscilla}} |
||
| + | *{{Tooltip|Prophet Lebioda}} |
||
| + | *{{Tooltip|Queen Adalia}} |
||
| + | *{{Tooltip|Queen Calanthe}} |
||
*{{Tooltip|Queen Meve}} |
*{{Tooltip|Queen Meve}} |
||
| + | *{{Tooltip|Radovid's Royal Guards}} |
||
*{{Tooltip|Reaver Hunter}} |
*{{Tooltip|Reaver Hunter}} |
||
*{{Tooltip|Reaver Scout}} |
*{{Tooltip|Reaver Scout}} |
||
| + | *{{Tooltip|Redanian Archer}} |
||
*{{Tooltip|Redanian Elite}} |
*{{Tooltip|Redanian Elite}} |
||
*{{Tooltip|Redanian Knight}} |
*{{Tooltip|Redanian Knight}} |
||
| Line 219: | Line 232: | ||
*{{Tooltip|Temerian Drummer}} |
*{{Tooltip|Temerian Drummer}} |
||
*{{Tooltip|Temerian Infantry}} |
*{{Tooltip|Temerian Infantry}} |
||
| + | *{{Tooltip|Temple Guard}} |
||
*{{Tooltip|Thaler}} |
*{{Tooltip|Thaler}} |
||
*{{Tooltip|Tormented Mage}} |
*{{Tooltip|Tormented Mage}} |
||
| Line 228: | Line 242: | ||
*{{Tooltip|Vernon Roche}} |
*{{Tooltip|Vernon Roche}} |
||
*{{Tooltip|Vincent Meis}} |
*{{Tooltip|Vincent Meis}} |
||
| + | *{{Tooltip|Vissegerd}} |
||
| + | *{{Tooltip|Voymir}} |
||
*{{Tooltip|Vysogota of Corvo}} |
*{{Tooltip|Vysogota of Corvo}} |
||
*{{Tooltip|Windhalm of Attre}} |
*{{Tooltip|Windhalm of Attre}} |
||
| Line 234: | Line 250: | ||
| − | === |
+ | === Special Cards === |
{{Col-begin}} |
{{Col-begin}} |
||
{{Col-2}} |
{{Col-2}} |
||
*{{Tooltip|Bloody Flail}} |
*{{Tooltip|Bloody Flail}} |
||
*{{Tooltip|Knighthood}} |
*{{Tooltip|Knighthood}} |
||
| + | *{{Tooltip|Mad Charge}} |
||
*{{Tooltip|Reinforcements}} |
*{{Tooltip|Reinforcements}} |
||
| ⚫ | |||
{{Col-2}} |
{{Col-2}} |
||
| + | *{{Tooltip|Runeword}} |
||
*{{Tooltip|Vandergrift's Blade}} |
*{{Tooltip|Vandergrift's Blade}} |
||
*{{Tooltip|Winch}} |
*{{Tooltip|Winch}} |
||
| Line 258: | Line 275: | ||
== Videos == |
== Videos == |
||
| − | [[File: |
+ | [[File:GWENT- Master Mirror - Northern Realms Evolving Card Spotlight|none|thumb|480x480px]] |
| + | [[File:Leader Spotlight- Queen Calanthe|none|thumb|480x480px]] |
||
==Witcher links== |
==Witcher links== |
||
Revision as of 11:02, 2 August 2020
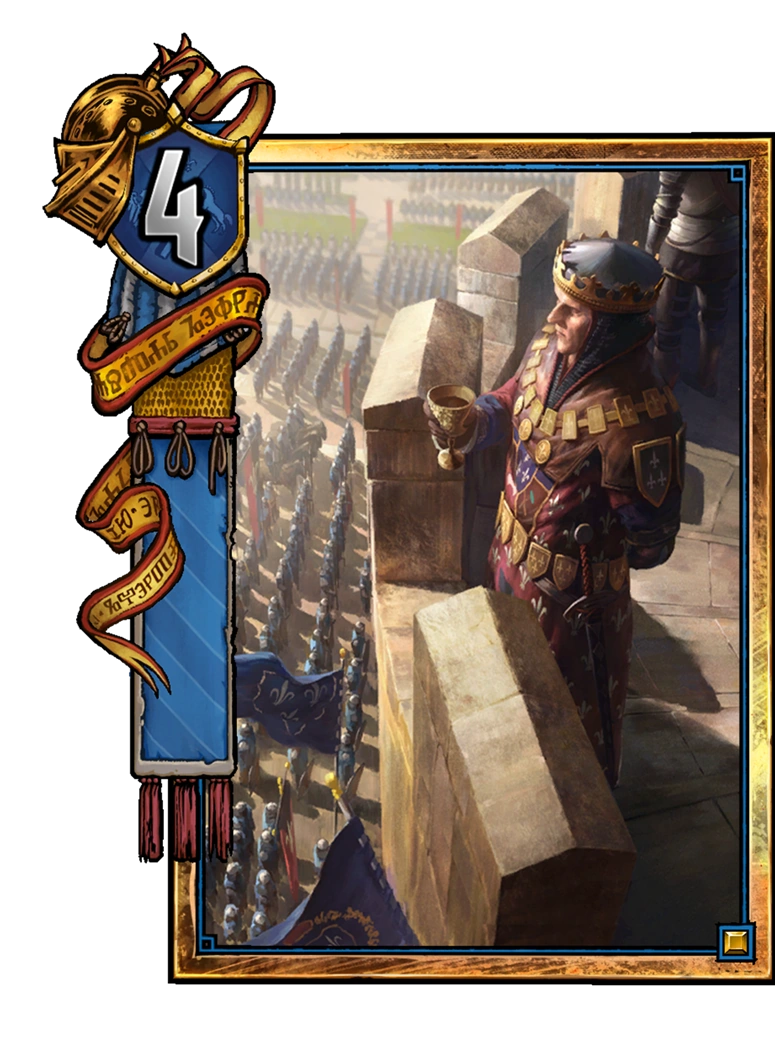
Northern Realms
The Northern Realms seek to gain control of the battlefield by reinforcing their numbers. Their valiant commanders march in the front lines to inspire their units and boost their strength. Their troops can be protected against attacks and weather spells thanks to Armor and Shields.
Cards History - Northern Realms
By type
Leaders
Gold
Bronze
Tokens
Cards Listed by Alphabetical Order
Unit
Special Cards
Removed or Faction-swapped
Videos
GWENT- Master Mirror - Northern Realms Evolving Card Spotlight
Leader Spotlight- Queen Calanthe
Witcher links
 See this subject on The Witcher wiki: Northern Kingdoms
- See this subject on The Witcher wiki: Northern Realms Gwent deck
Patch changes
- Gwent Update: Dec 19, 2017: Renamed many cards. Every unit will now be agile. Deathwish abilities no longer trigger at the end of the round. There is now a limit of 9 units per row. The Token category has been added to the game. Tokens are automatically removed from the game on entering the graveyard. Removed Triptych arts.
- Gwent Update: Aug 29, 2017: Gold cards can now be interacted with by most cards (unless stated otherwise). Changed name of Kaedweni Siege Platform to Kaedweni Siege Master. Added lots of new tags: Spell, Soldier, Support, Officer, Tactics, Agent, Double Agent, Redania, Temeria, Kaedwen, Aedirn, Cintra.
- Gwent Update: May 24, 2017: The Northern Realms faction has been reworked and undergone major changes.; Faction abilities have been removed from the game.